How to create a blog using Hexo, Github Pages, Cloudflare with SSL
Step by step with images

UPDATE 2021
Those this steps are really easy replacement by import your hexo repo into vercel , but if for any reason you don't want to use vercel, keep reading.
We need:
- A godaddy.com account with a domain
- A cloudflare.com account
- A github.com account
- Git Bash (https://git-scm.com/downloads)
- Node JS (https://nodejs.org)
Process
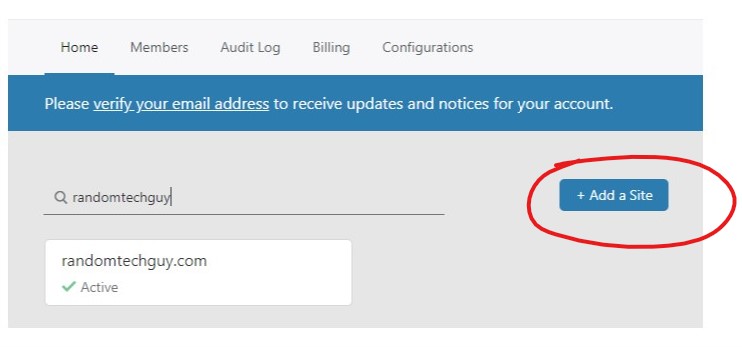
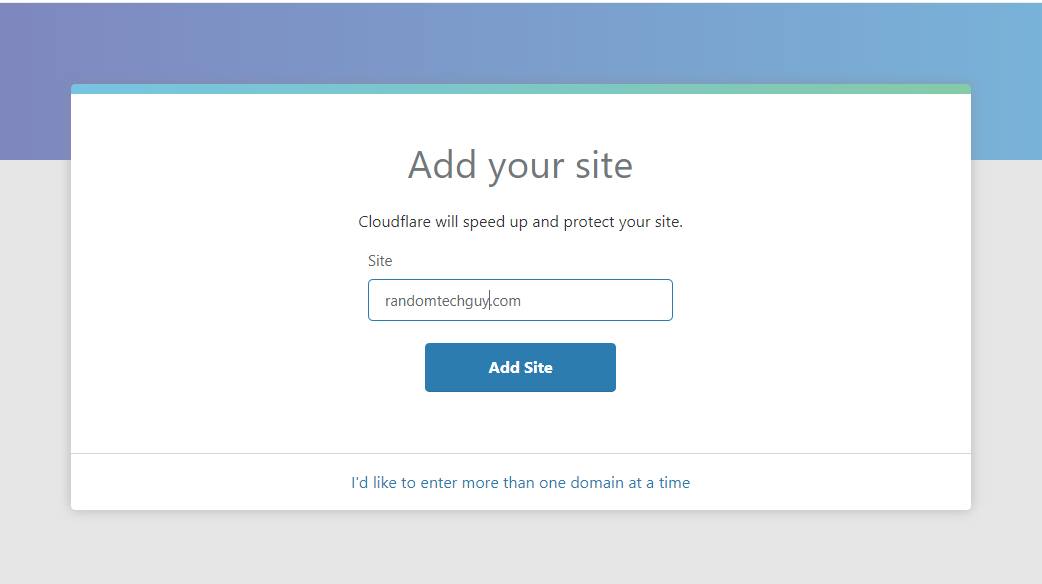
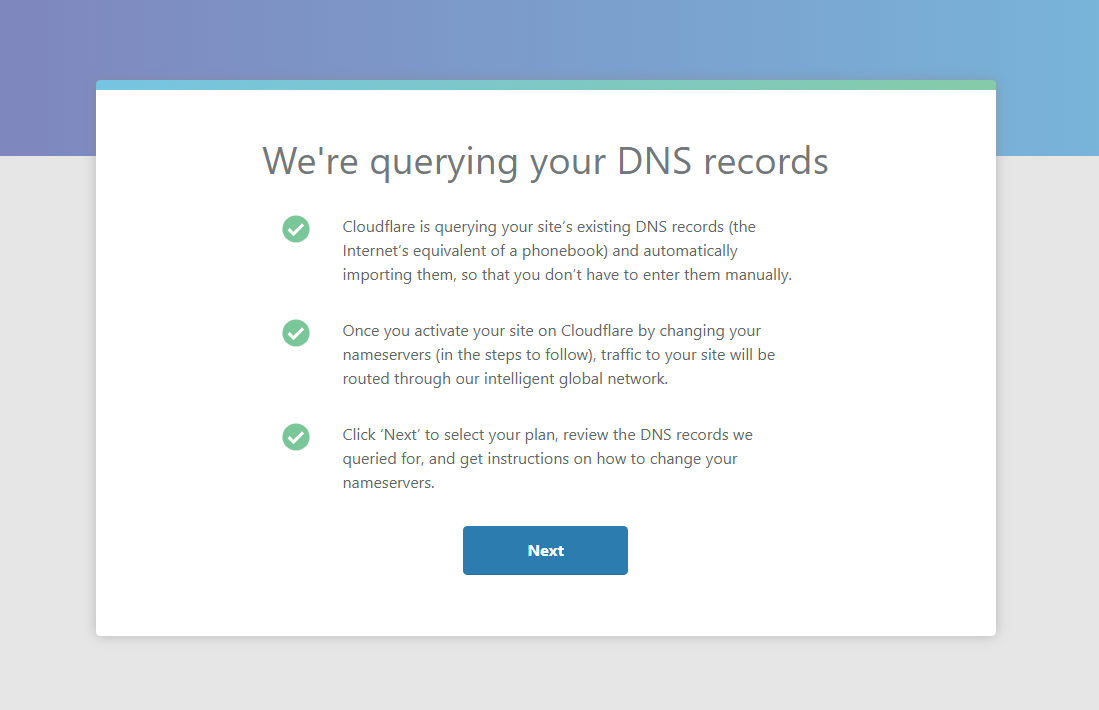
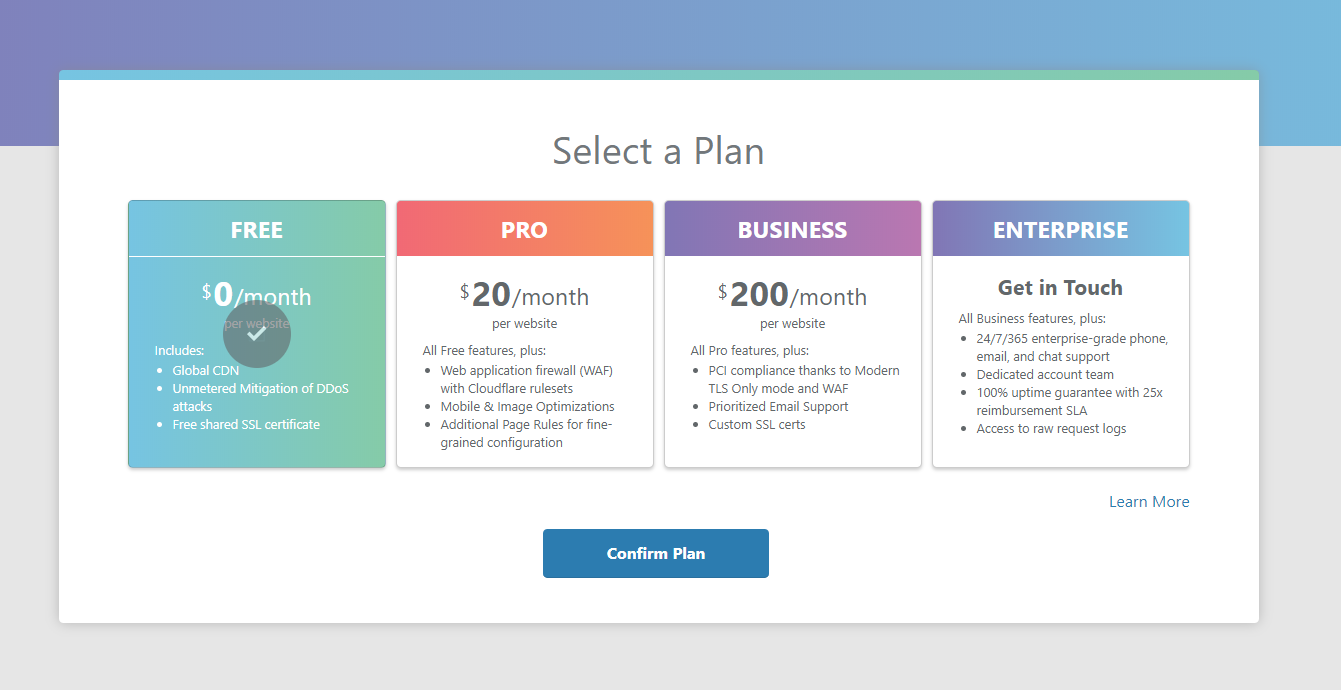
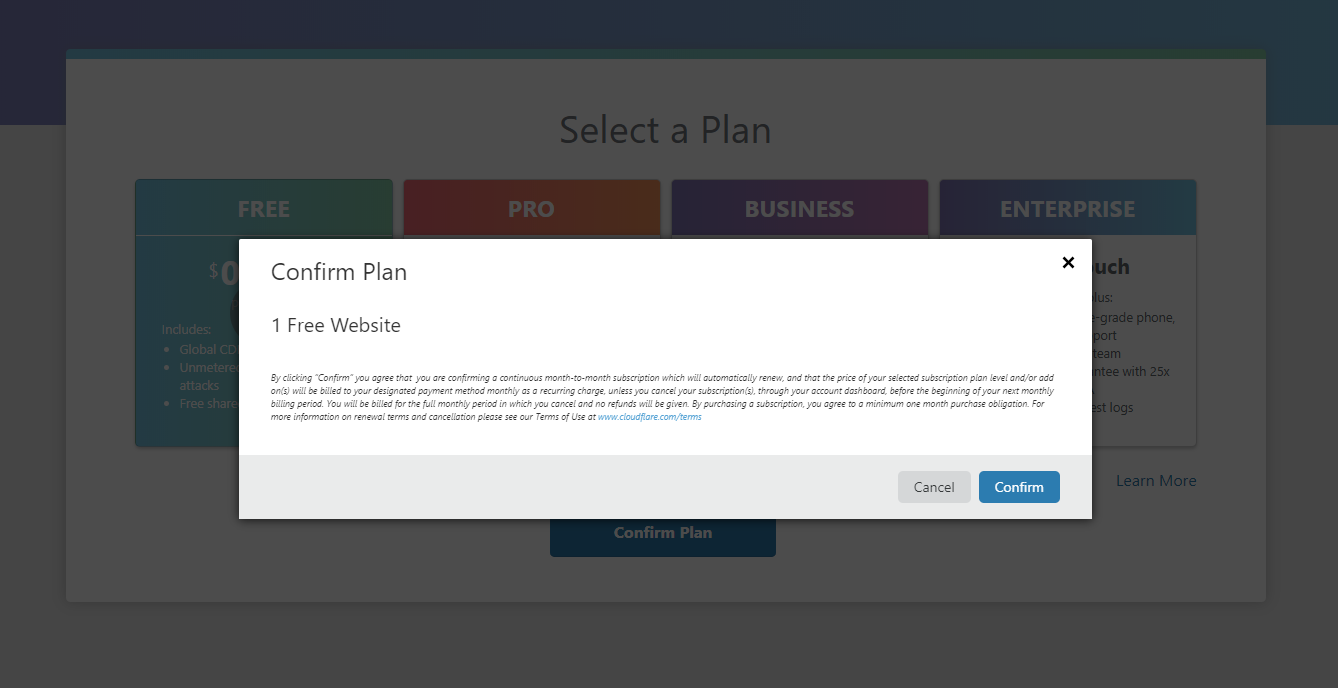
1. Enter to cloudflare.com and add a site

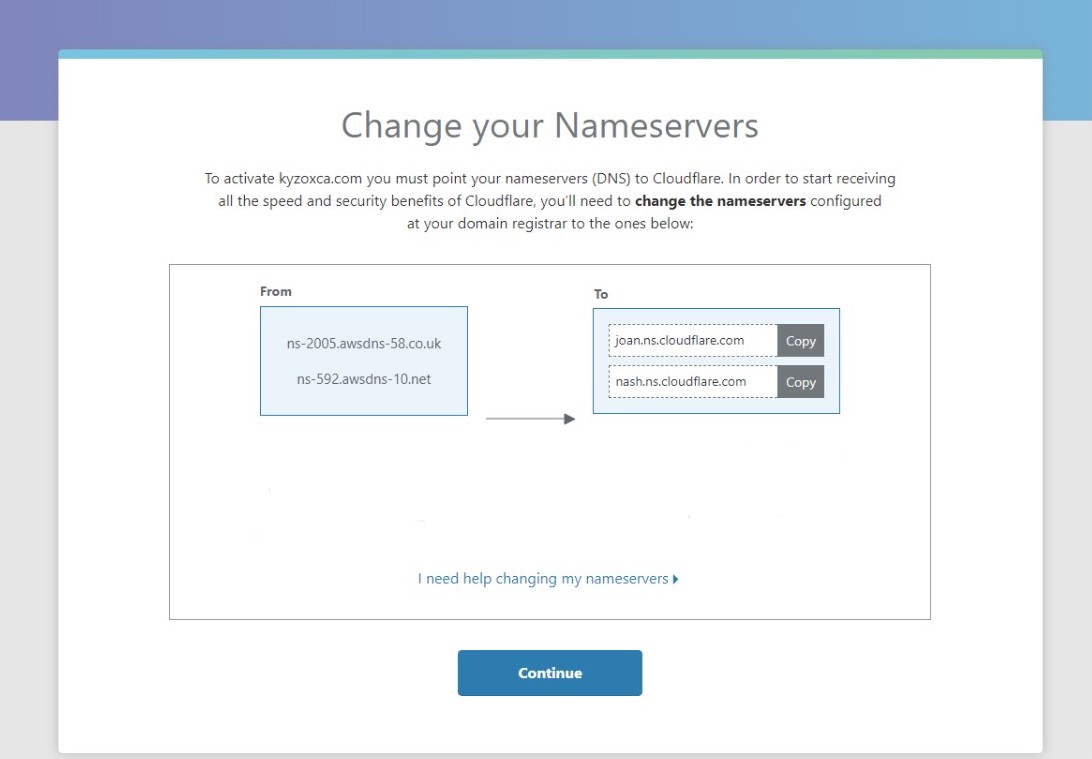
2. Enter to godaddy.com and config nameservers
Setup Nameservers
Click on "DNS"
 In the section "Nameservers" click on "Change"

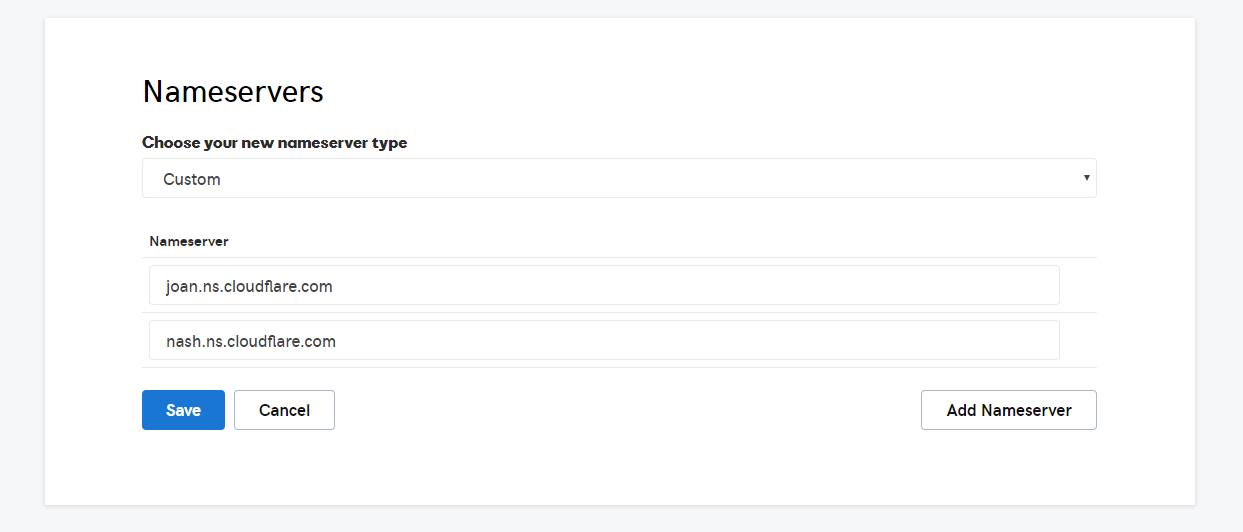
Select custom and add cloudflare's nameservers
Delete any nameserver if exist.
Cloudflare nameservers
- joan.ns.cloudflare.com
- nash.ns.cloudflare.com
Validate Nameservers
According to Cloudflare and Godaddy the process to change nameservers can take up to 24 hours, but normally take a few minutes, you can validate in two ways:
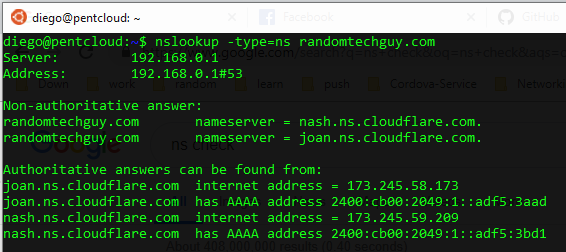
From CLI
Open the terminal and paste next command
$ nslookup -type=ns randomtechguy.com
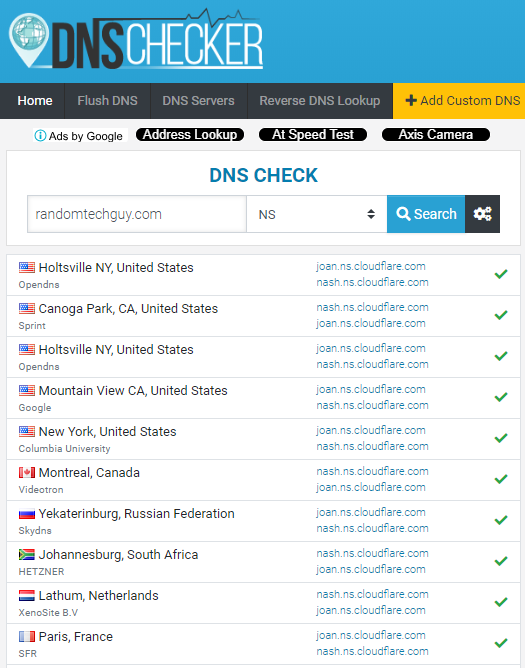
From web
Enter to https://dnschecker.org/
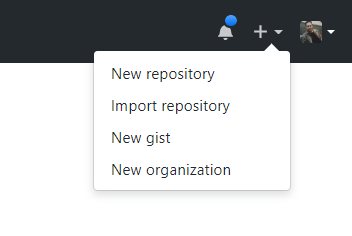
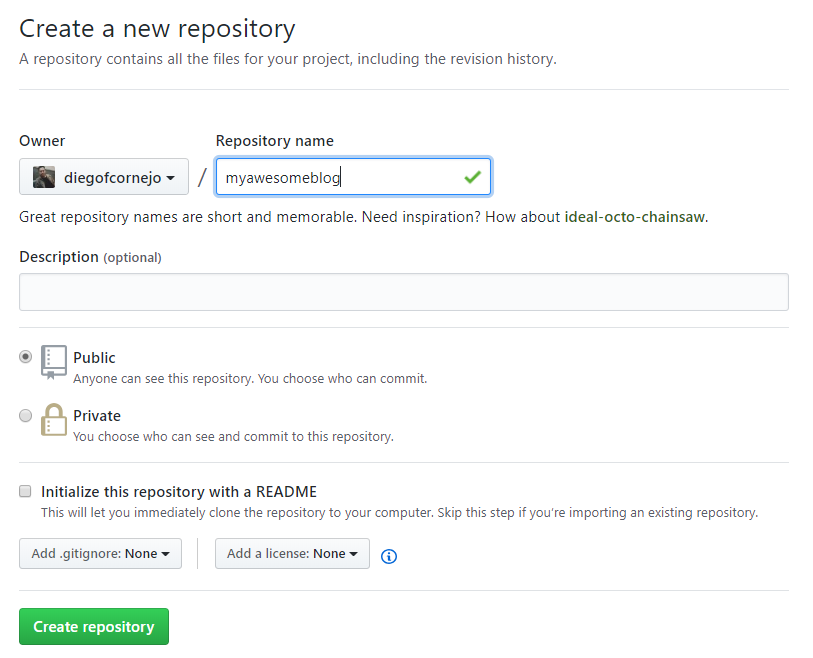
3. Create a repo in Github
Enter to github.com and create repo
 Add a name to your new repo and click on "Create repository"
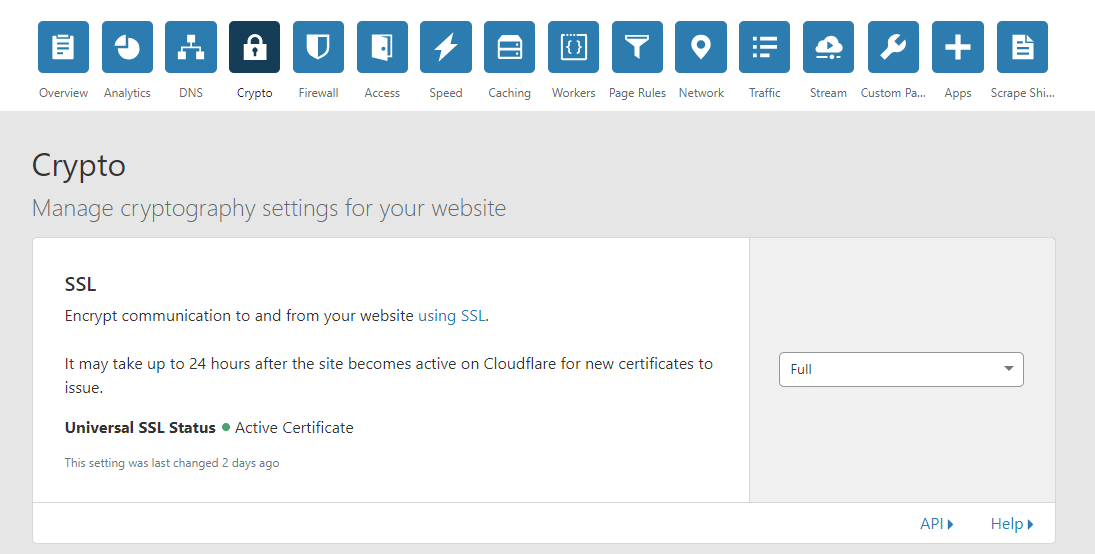
4. Verifies security certs availability(SSL)
At this time your domain is management by cloudflare so we have an SSL certificate.
Enter to cloudflare.com
Click on your site created at step 1
Click on Crypto and verify certificate status, it should be active like under image:
 Go to section "Always Use HTTPS" and check "On"

From here we will use the terminal :D
5. Install hexo (https://hexo.io/)
Open the terminal
# Install hexo globally
$ npm install hexo-cli -g
# Start a hexo project
$ hexo init myawesomeblog
# Enter to project folder and install dependencies
$ cd myawesomeblog
$ npm install
# Test our new blog
hexo server
# This command should return
INFO  Start processing
INFO  Hexo is running at http://localhost:4000 . Press Ctrl+C to stop.
Open a browser with url http://localhost:4000. Don't close the terminal, we will use later
The next steps are based on a awesome post by Jeff Ferrari https://www.poweredbyjeff.com/2018/05/14/Deploying-Hexo-website-to-Github-Pages/
6. Setup hexo for upload to Github
Edit _config.yml
Edit URL url: https://randomtechguy.com #your domain with https
Edit public dir from public to docs public_dir: docs
Comment deploy config
#deploy:
#   type:
7. Generate files and upload to Github
Open the terminal
Generate files
# Remove plugins
$ npm uninstall hexo-generator-cname hexo-deployer-git
# Create CNAME file in source folder, use nano, vim or your prefer editor
$ nano source/CNAME #no extension, all uppercase
# The contents of this file should be the domain of your website
$ echo myawesomeblog.com > source/CNAME
# Generate files
hexo generate
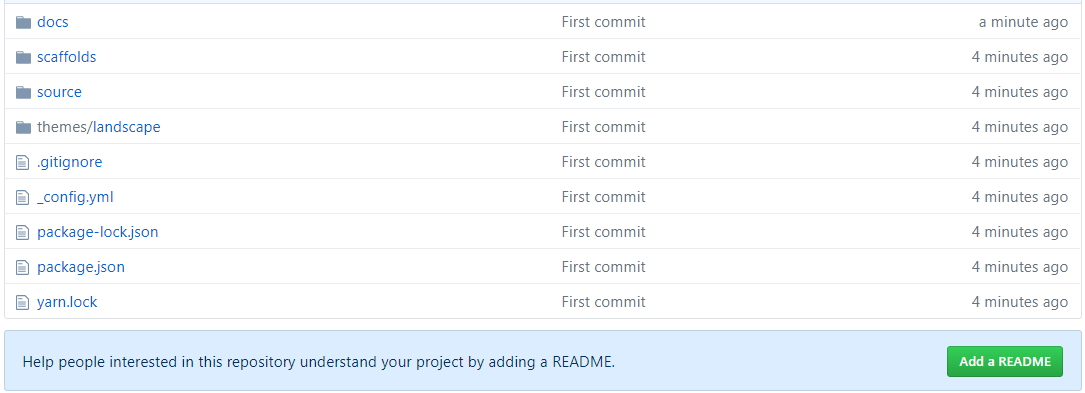
# This commando should generate a folder named docs
Add remote origin and make first commit
You can see original post in Github Help https://help.github.com/articles/adding-an-existing-project-to-github-using-the-command-line/
$ git init
$ git add .
$ git commit -m "First commit"
# Add remote origin URL, use URL from your repo created at the step 3
$ git remote add origin remote https://github.com/diegofcornejo/myawesomeblog.git
# Verifies the new remote URL
git remote -v
# Push changes
$ git push origin master
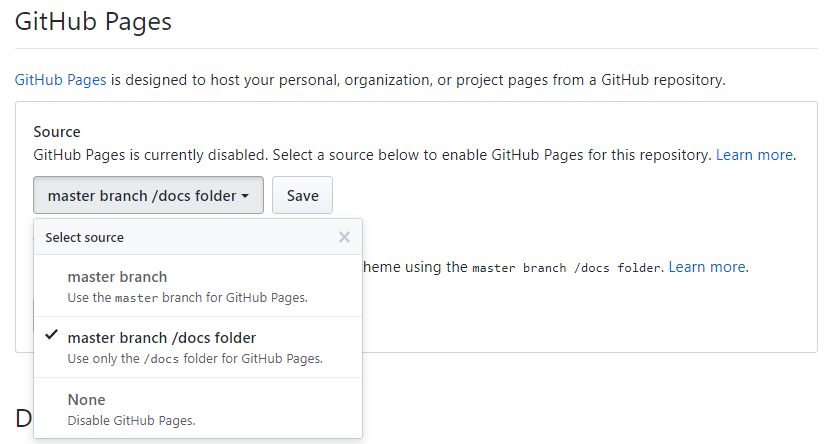
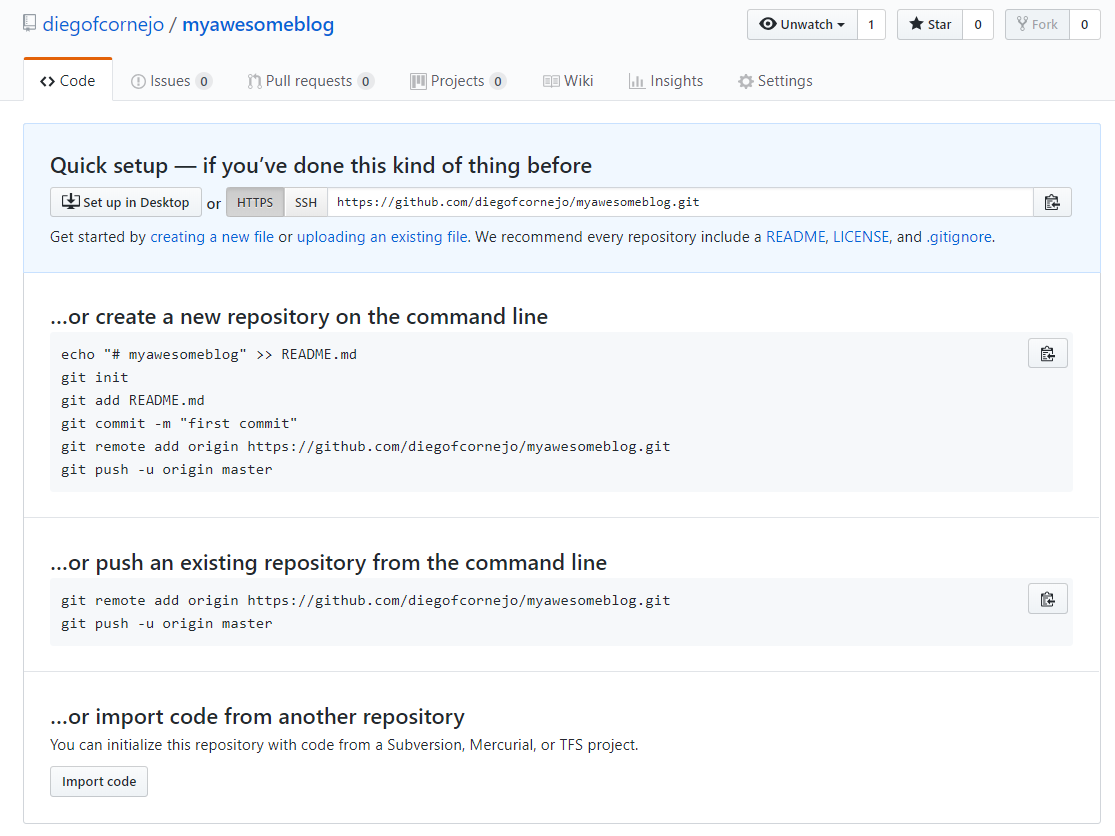
8. Setup Github Pages
Open your repo on the web
Now should see files in your repo
 Click on Tab "Settings"
 On section "Github Pages" Select master branch / docs folder and Save